What is it?
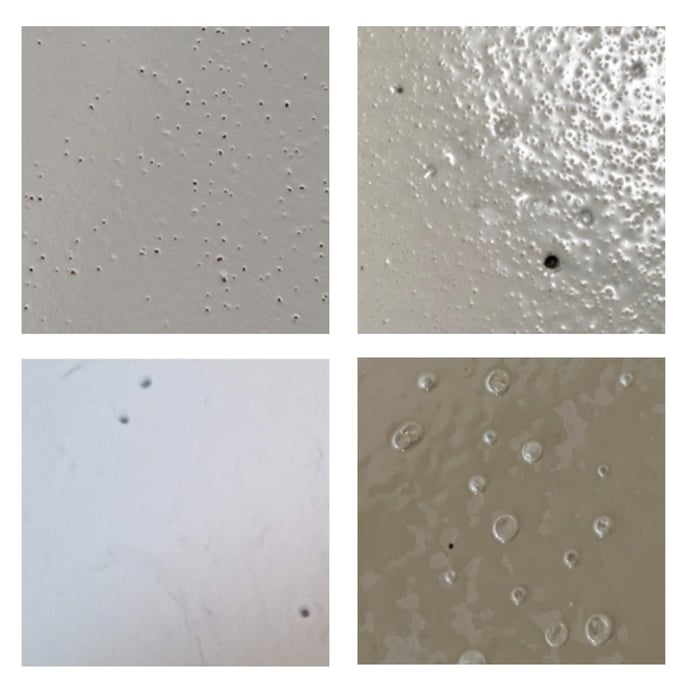
This is an issue known as “Pinholes”, often identified by a perforation in the flooring/coating that appears as many small holes in the surface.
Common Causes:
Porosity of the substrate – A porous surface can cause air to be trapped during the coating process as it pulls the coating into the surface whilst it’s curing. This will cause pinholes that appear as “craters” due to the product sinking into the air pocket.
Moisture – Any moisture present during the coating can cause bubbles, this is due to the coating reacting with the water. When the bubbles pop, they sink in on themselves and cause holes across the surface.
Preparation – Some floors contain holes naturally; however, some types of concrete mixes can contain more than others and can cause bubbles to come up through the substrate. These are easily identifiable during the priming layer, as a primer often highlights any pinholes present in the substrate.
Use of Solvent – The use of solvent is not something we recommend. When solvent evaporates it creates bubbles that, once popped, will cause pinholes to appear in the coating.
Fast Mixing – High powered mixers/high speed settings on drills can cause bubbles due to the speed of the mixing introducing gas into the paint. Unless this is left to settle, the bubbles once they meet the surface will pop and leave pinholes during the curing process.
Slow application – Applying the coating too slowly can lead to the coating being applied at an extended point of the cure process. This results in air bubbles rising to the surface which causes craters, however as the coating is too thick, it is unable to flow back into the craters and it forms pinholes.
So, how would I resolve this?
- Do not attempt to fill the pinholes with another coat of paint. It is recommended that you fill all the pinholes before applying further product, using our Resincoat Pinhole Filler.
- Once the filler has been applied into the pinholes, ensure the product has fully cured (follow the data sheet for the body filler for curing times).
- Sand off any excess.
- You will then be able to re-coat the surface for a uniform finish.